Fixing Torn Out Landing Gear

Recently I traded for a 78" Flight Model 78" Extra 330SC. The plane originally had a VVRC 40 Twin on it. The gentleman I got it from told me that they could not get the 40 to stay running and after multiple dead stick landings they had finally ripped the gear out of the plane. The gear had rotated backward, tore out the gear plate and as the gear rotated backward it broke the support formers for the gear and ripped apart the side of the fuselage. Additionally the bottom of the cowl was completely destroyed. Unfortunately I don't have a pictures of the initial damage as I had not intended on writing an article.
Landing Gear and Fuselage Repair:
The lateral landing gear supports were broken when the gear was folded back. The red line roughly shows where the damage was, everything above the red line was broken out. I fabricated plywood plates and used 30 minute epoxy to adhere the plates to the outsides of the broken formers. The locknuts pictured connect aluminum angle stock to the gear plate and landing gear.
Once the gear plate was installed I need to repair the formers that made up the exhaust tunnel and lower motor box supports. I started by fitting plates on both sides of the motor box. Then I fitted plates triangular plates to repair the reward and lower portion of the motor box mounts.
The areas where I added formers I left a 1/16 inch inset to allow for sheeting once the repair work was completed.
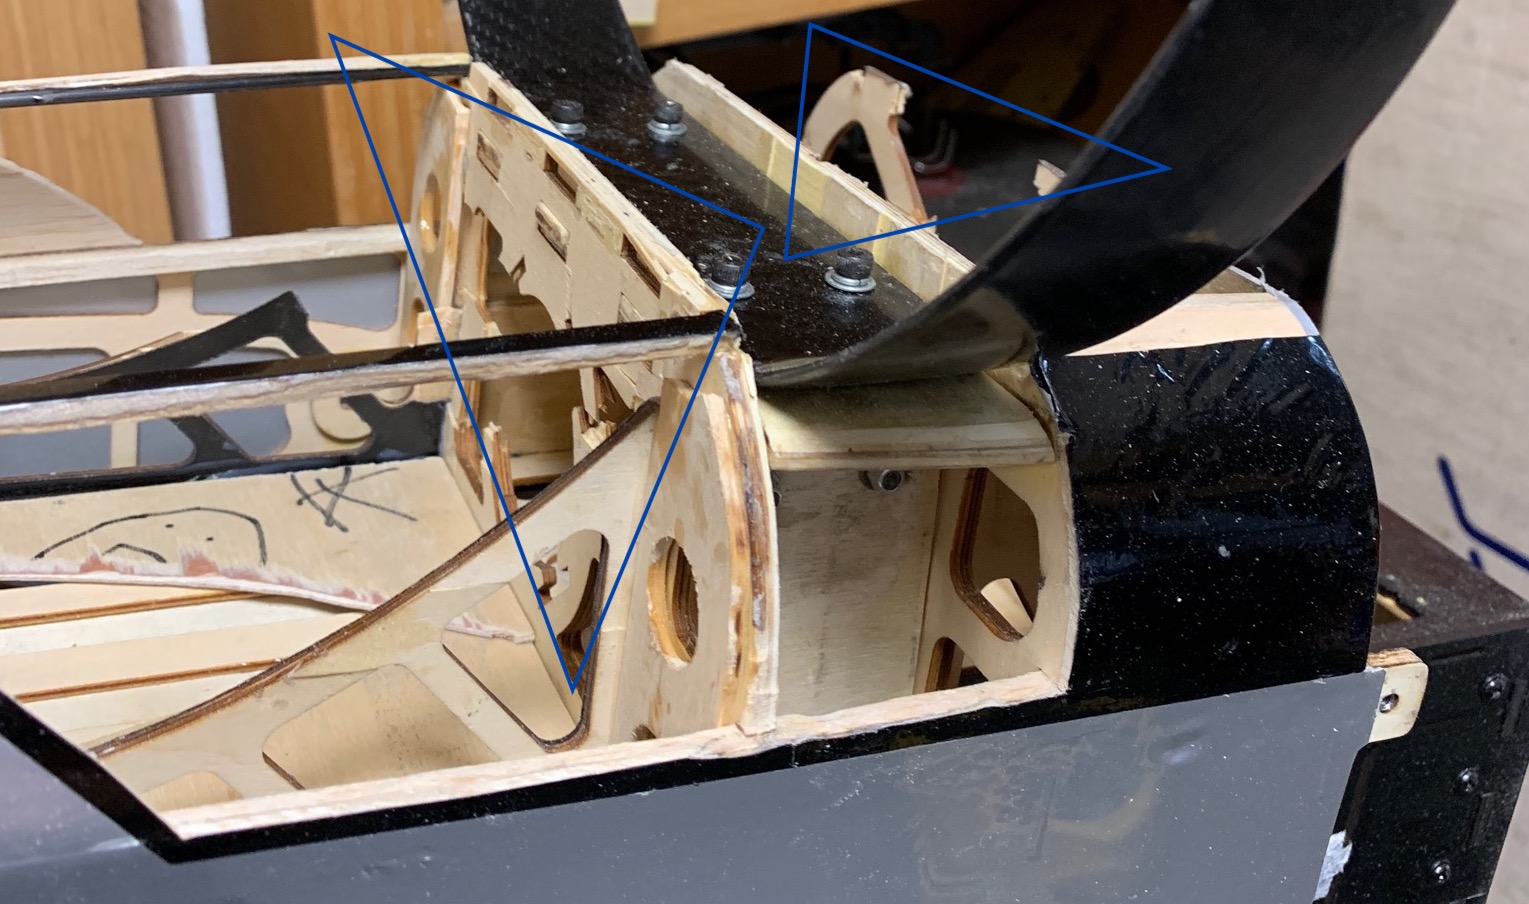
The areas in blue were the next section that needed to be fabricated. Since I intended on using stock exhaust, I used 1/8” plywood to make plates to cover the broken areas.
Once everything was cut and dry fitted. I used 30 minute epoxy to adhere the plywood plates to their respective areas. Note that I glued the plates wood to wood and not to the carbon fiber laminate. The laminate itself has a release agent on it and will not allow the epoxy to adhere to it without sanding it. Additionally I added some 1/4” square stock to the sides and bottom of the exhaust tunnel.
The bottom of the firewall where the exhaust tunnel was located was broken as well. I added some 1/16” plywood to cover the hole for the exhaust tunnel and the broken out area. This was then covered with epoxy thinned down with alcohol to fire and fuel proof the new wood.
The areas in red are where the missing stringers were located. I left the notches for these stringers in the undamaged plate and created notches in the newly added plates.
I added the stringers and sheeted the repaired area. When a curve is required for sheeting like in this case, I glued the the flat section down using thin CA. Then I misted the sheeting with a small amount of water and gently rolled the sheeting onto the formers and glued it using medium CA. Then I held it in place until the glue cured. Note: when rolling sheeting around an angle the grain of the sheeting needs to be horizontal with the curve.
Once the sheeting was added, the area was sanded, wiped down to remove any sawdust and then covered with Ultracote that was cut to match the exposed wood and overlap the original Ultracote by 1/8” or more. Then the gear was mounted in place.


_130420240639_com.jpeg)


